
Designing a Keypad Scanner
Lab Report
Introduction
I designed a keypad scanner that displayed the last two digits pressed onto two seven segment displays.
Design and Testing Methodology
Debouncing
It turns out that reading input from a keyboard matrix is a nontrivial task, or at least it’s a bit harder than just reading the output from pins. One of the biggest issues that I needed to overcome was mechanical switch debounce.
Put simply, switch debounce occurs in mechanical switches, when the switch is initially pressed down, the inside physically bounces up and down a bit before making contact, causing a noisy and unclean signal.
In order to address, this, I included a debouncer module. This module pretty much just waits until the key has been held down for at least 10 ms, essentially waiting out the instability, before deciding that the key was pressed. There were multiple ways to address debounce. I could have done so with analog hardware, but it seemed easier to just address it in Verilog.
In Verilog, there were two approaches I considered.
- Waiting until the key was held for x time, then registering the keypress
- Registering the keypress immediately, and then not registering any keypresses until its unheld
The 2nd one has lower latency, but might be less accurate, in the event that the switches somehow make contact for a small amount of time. So I picked the first one, because a couple milliseconds of latency didn’t seem to cause an issue, and this would be slightly more accurate.
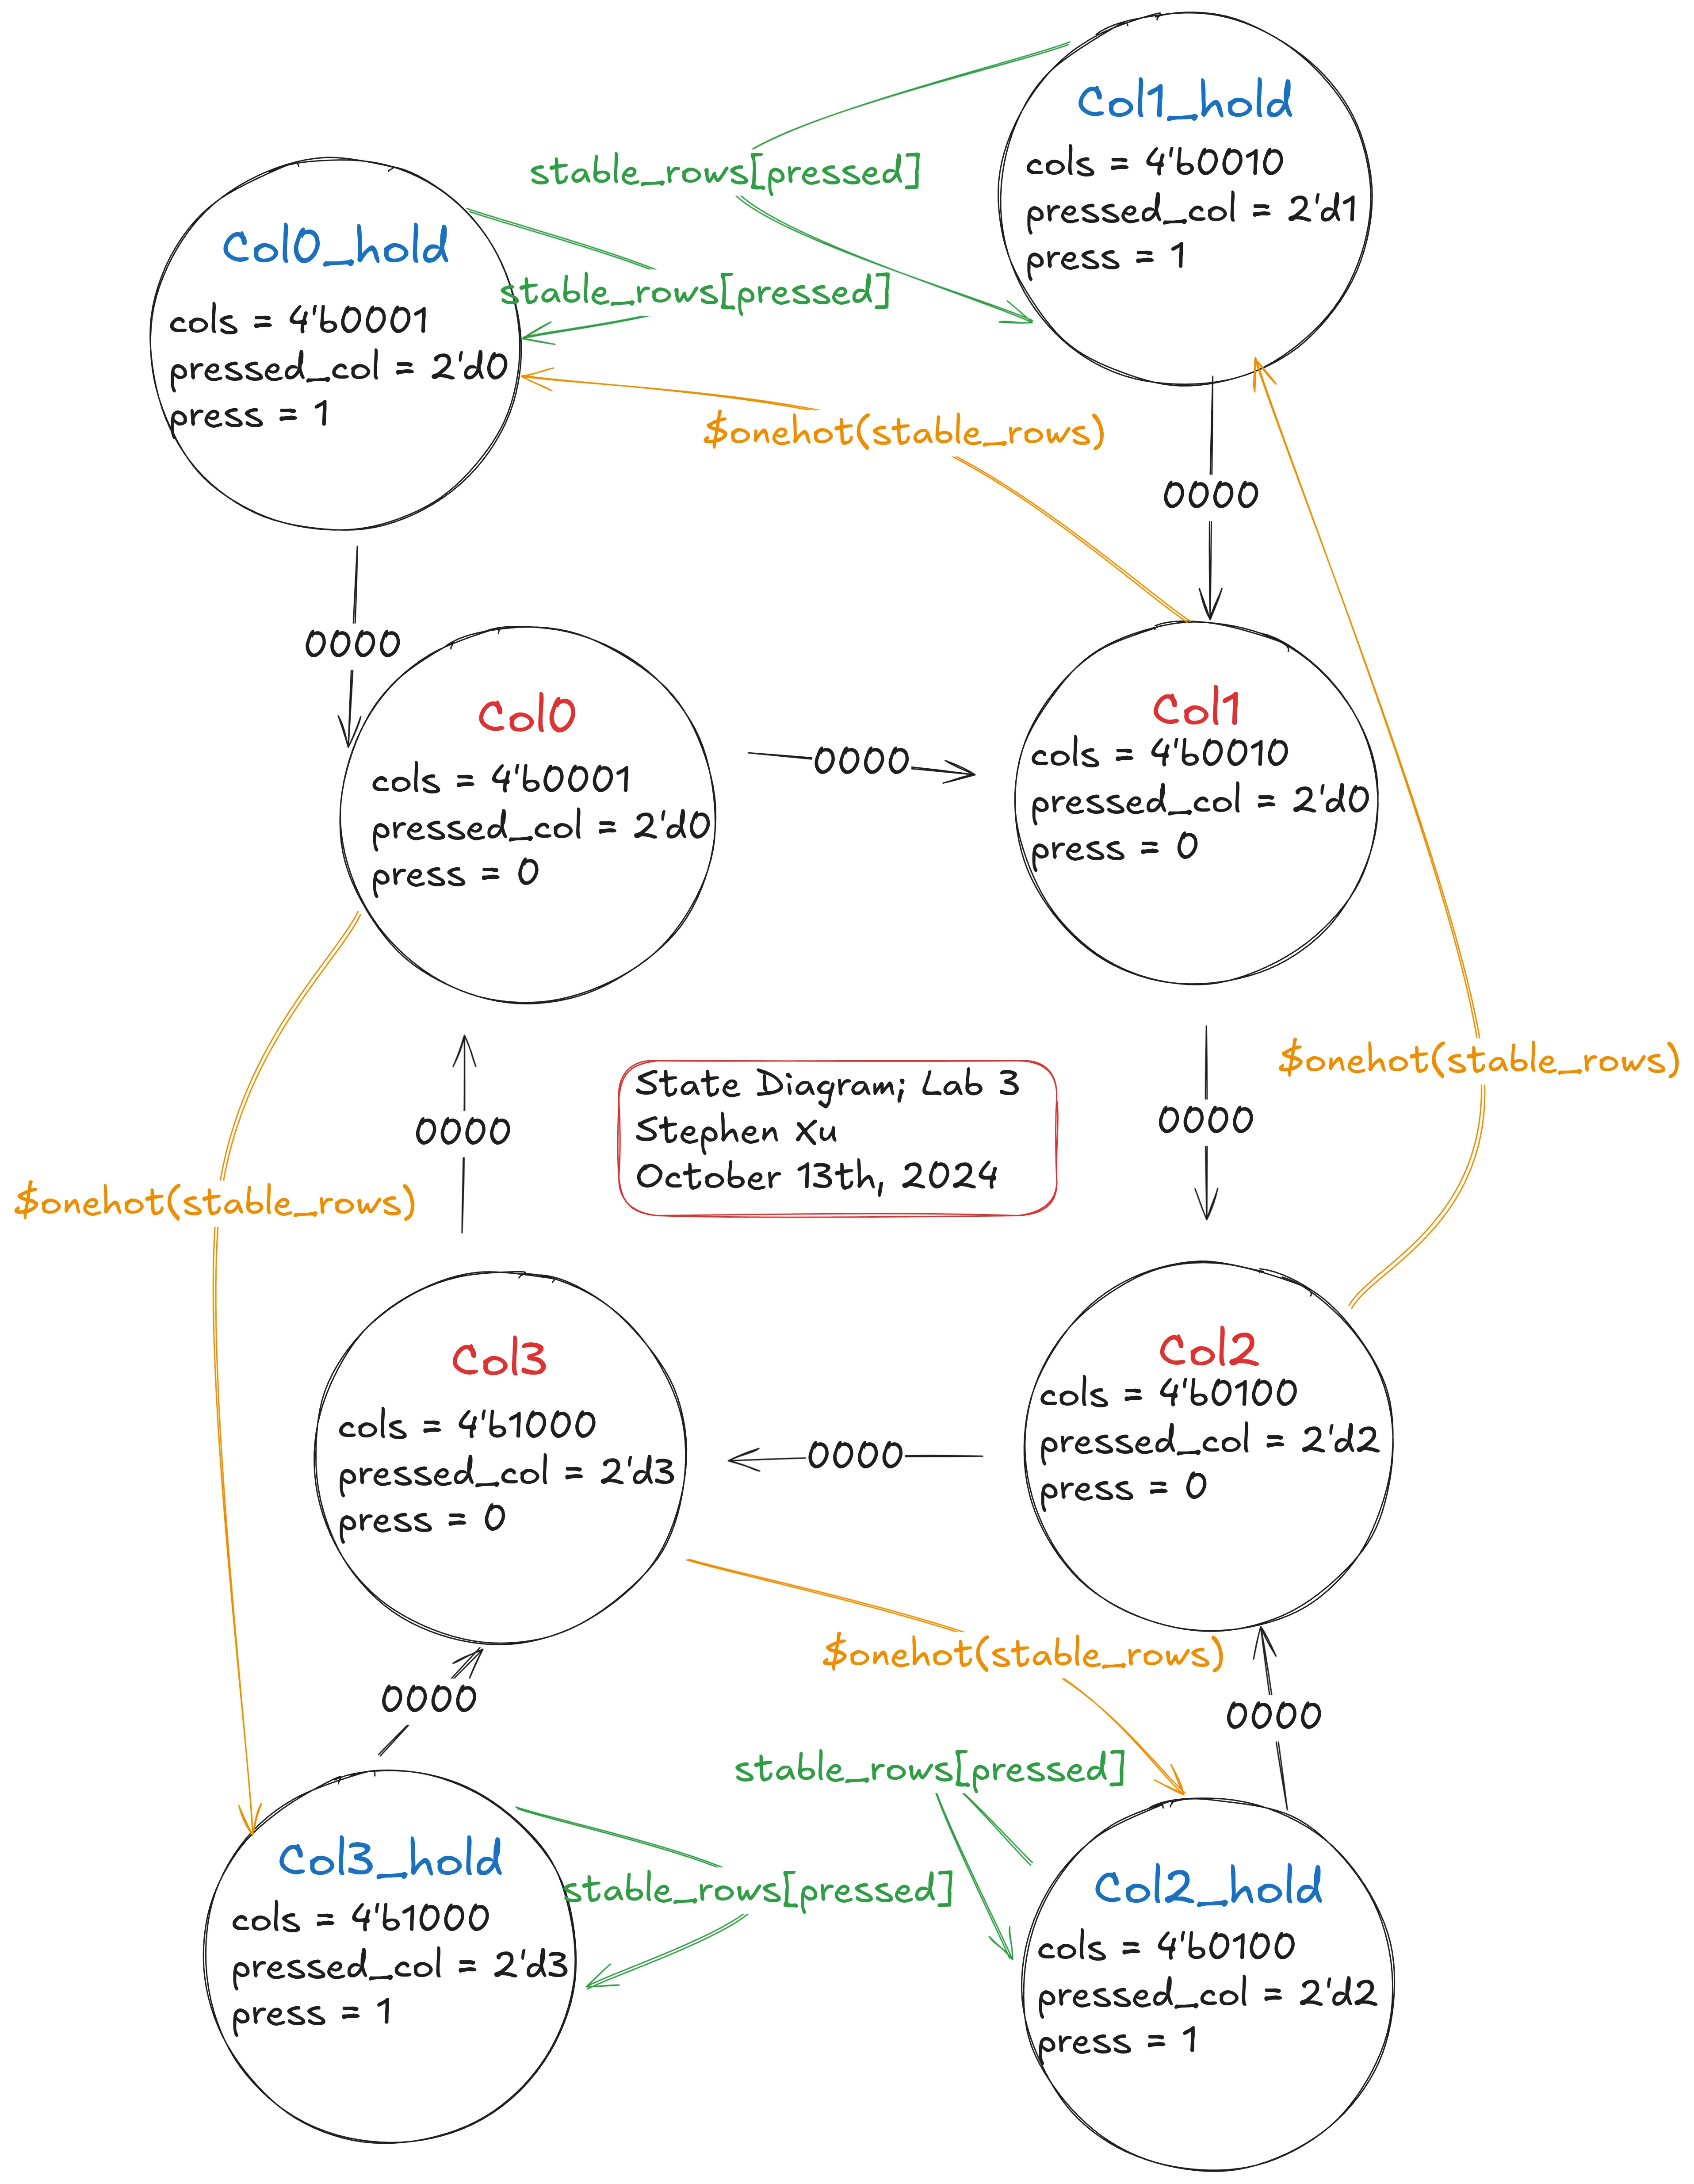
In order to properly read input from our keypad scanner, we turn to … a state machine! We include the following states.
The reason why col0 being pressed takes the state back to col3_hold (and similarily the other states being misaligned) is because of the synchronizer, which causes a delay that must be taken into account.
| Current State | Condition | Next State | cols | pressed_col | press |
|---|---|---|---|---|---|
| col0 | $onehot(stable_rows) | col3_hold | 4’b0001 | 2’d0 | 0 |
| col0 | !$onehot(stable_rows) | col1 | 4’b0001 | 2’d0 | 0 |
| col1 | $onehot(stable_rows) | col0_hold | 4’b0010 | 2’d1 | 0 |
| col1 | !$onehot(stable_rows) | col2 | 4’b0010 | 2’d1 | 0 |
| col2 | $onehot(stable_rows) | col1_hold | 4’b0100 | 2’d2 | 0 |
| col2 | !$onehot(stable_rows) | col3 | 4’b0100 | 2’d2 | 0 |
| col3 | $onehot(stable_rows) | col2_hold | 4’b1000 | 2’d3 | 0 |
| col3 | !$onehot(stable_rows) | col0 | 4’b1000 | 2’d3 | 0 |
| col0_hold | stable_rows[pressed] | col0_hold | 4’b0001 | 2’d0 | 1 |
| col0_hold | !(stable_rows[pressed]) | col1 | 4’b0001 | 2’d0 | 1 |
| col1_hold | stable_rows[pressed] | col1_hold | 4’b0010 | 2’d1 | 1 |
| col1_hold | !(stable_rows[pressed]) | col2 | 4’b0010 | 2’d1 | 1 |
| col2_hold | stable_rows[pressed] | col2_hold | 4’b0100 | 2’d2 | 1 |
| col2_hold | !(stable_rows[pressed]) | col3 | 4’b0100 | 2’d2 | 1 |
| col3_hold | stable_rows[pressed] | col3_hold | 4’b1000 | 2’d3 | 1 |
| col3_hold | !(stable_rows[pressed]) | col0 | 4’b1000 | 2’d3 | 1 |
And here is the diagram:
Technical Documentation
The source code can be found in this repository.
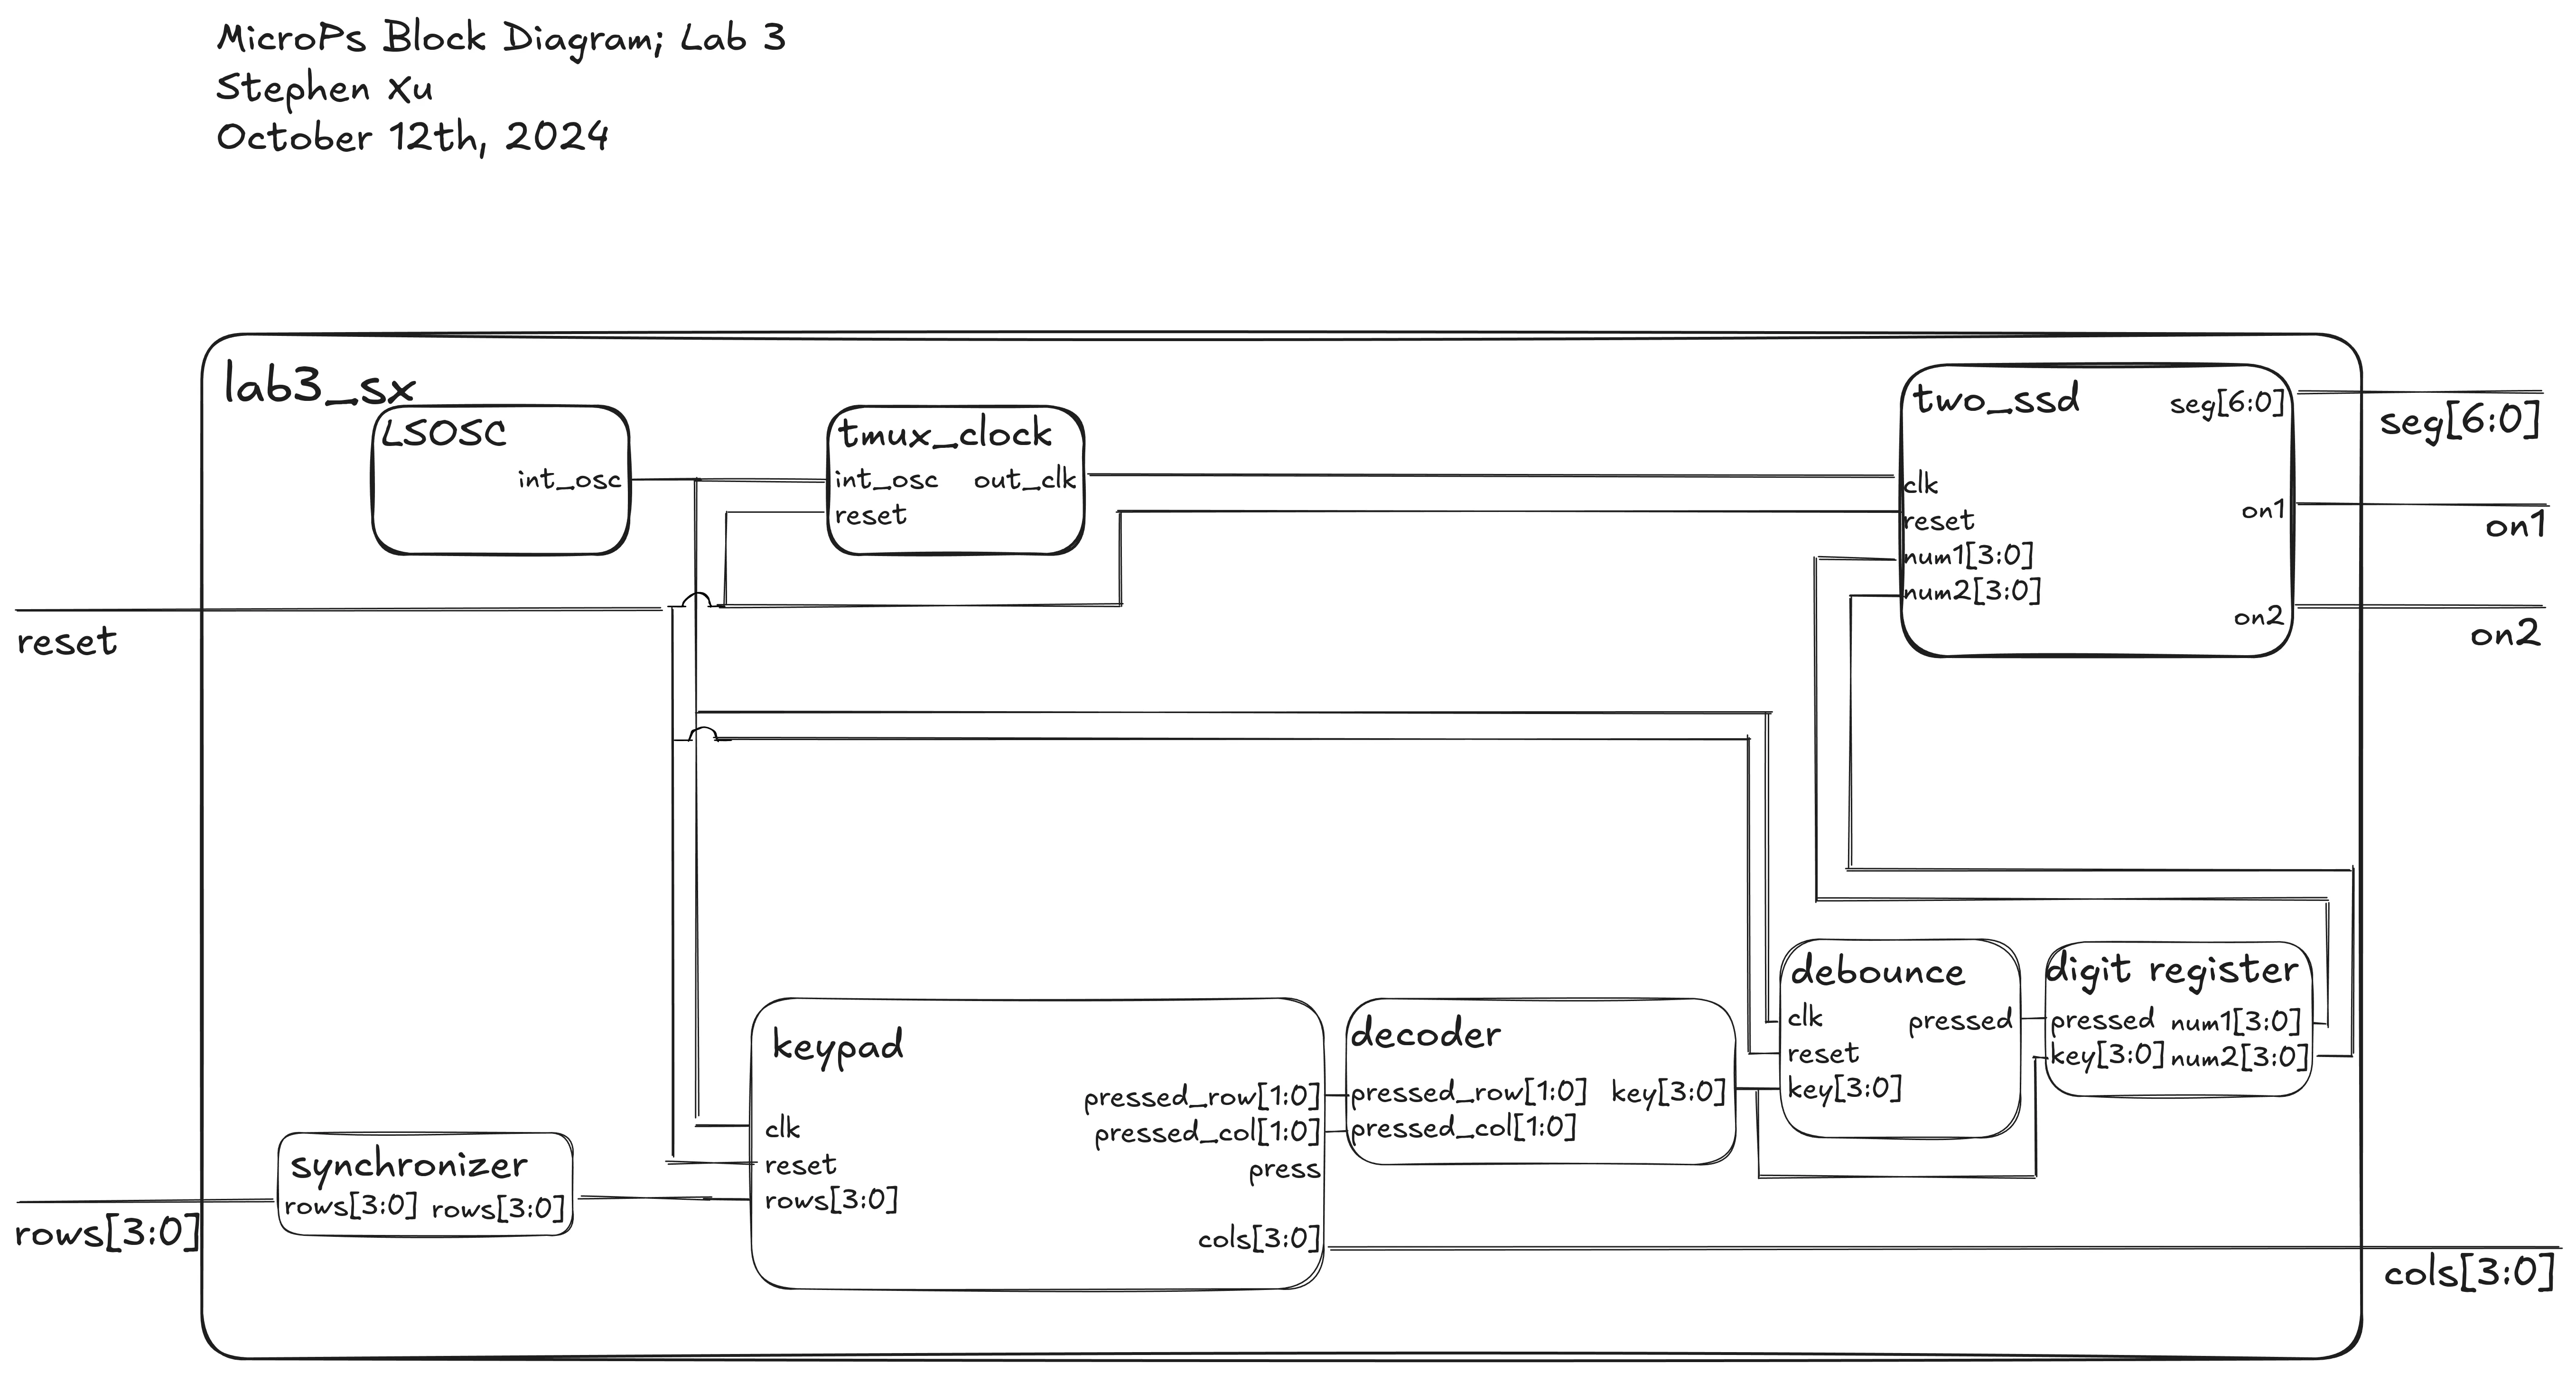
Block Diagram
Below is the block diagram for the lab.
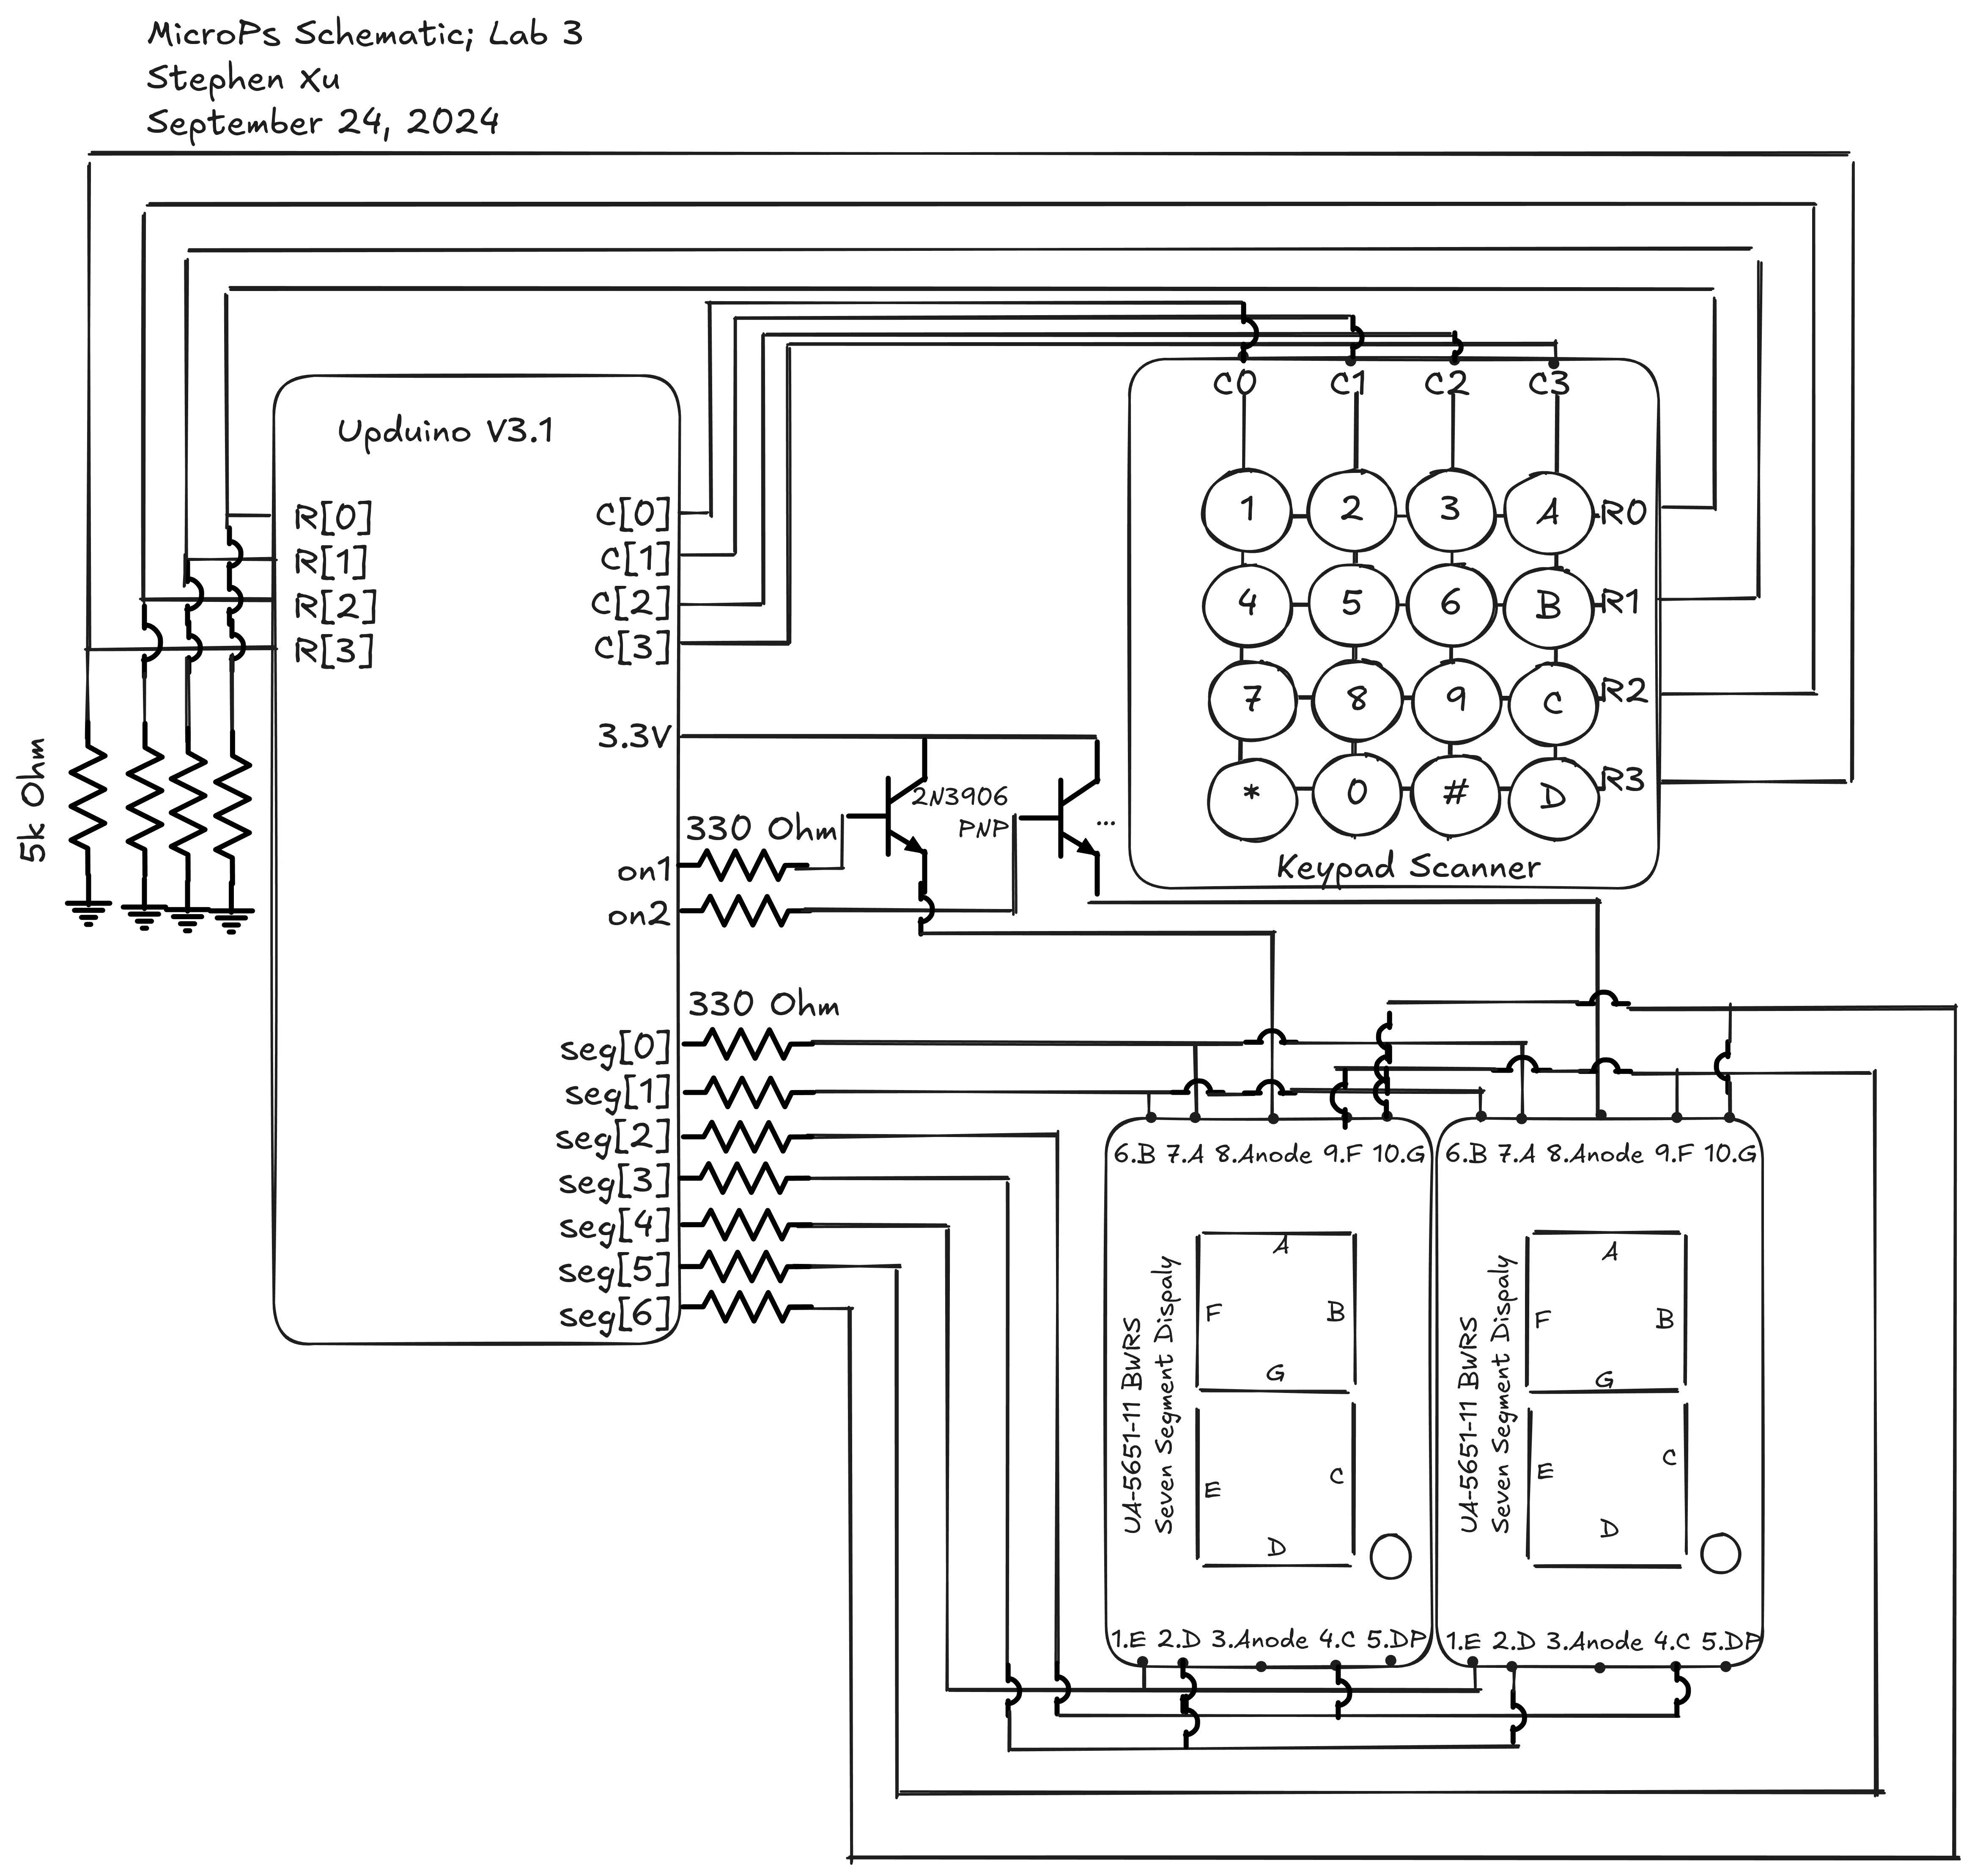
Schematic
Here’s a schematic showing the keypad scanner.
Results and Discussion
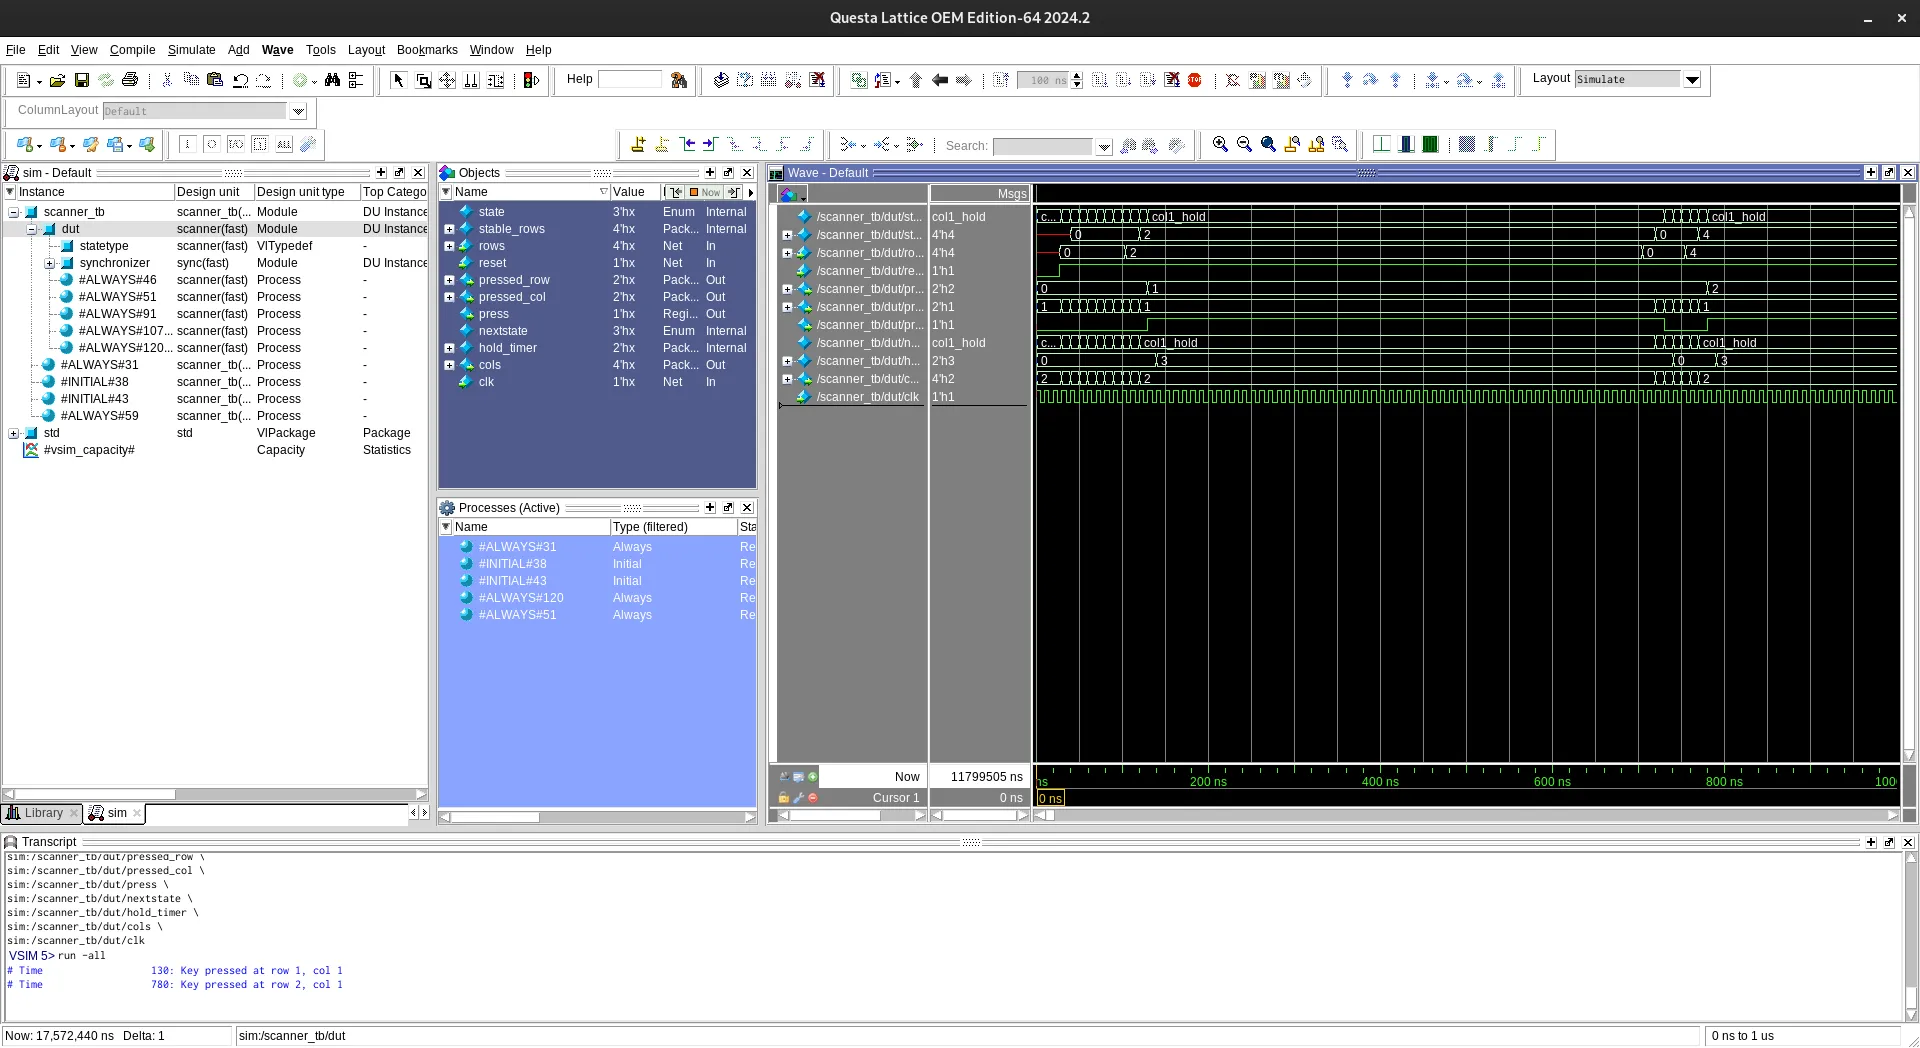
Testbench Simulation
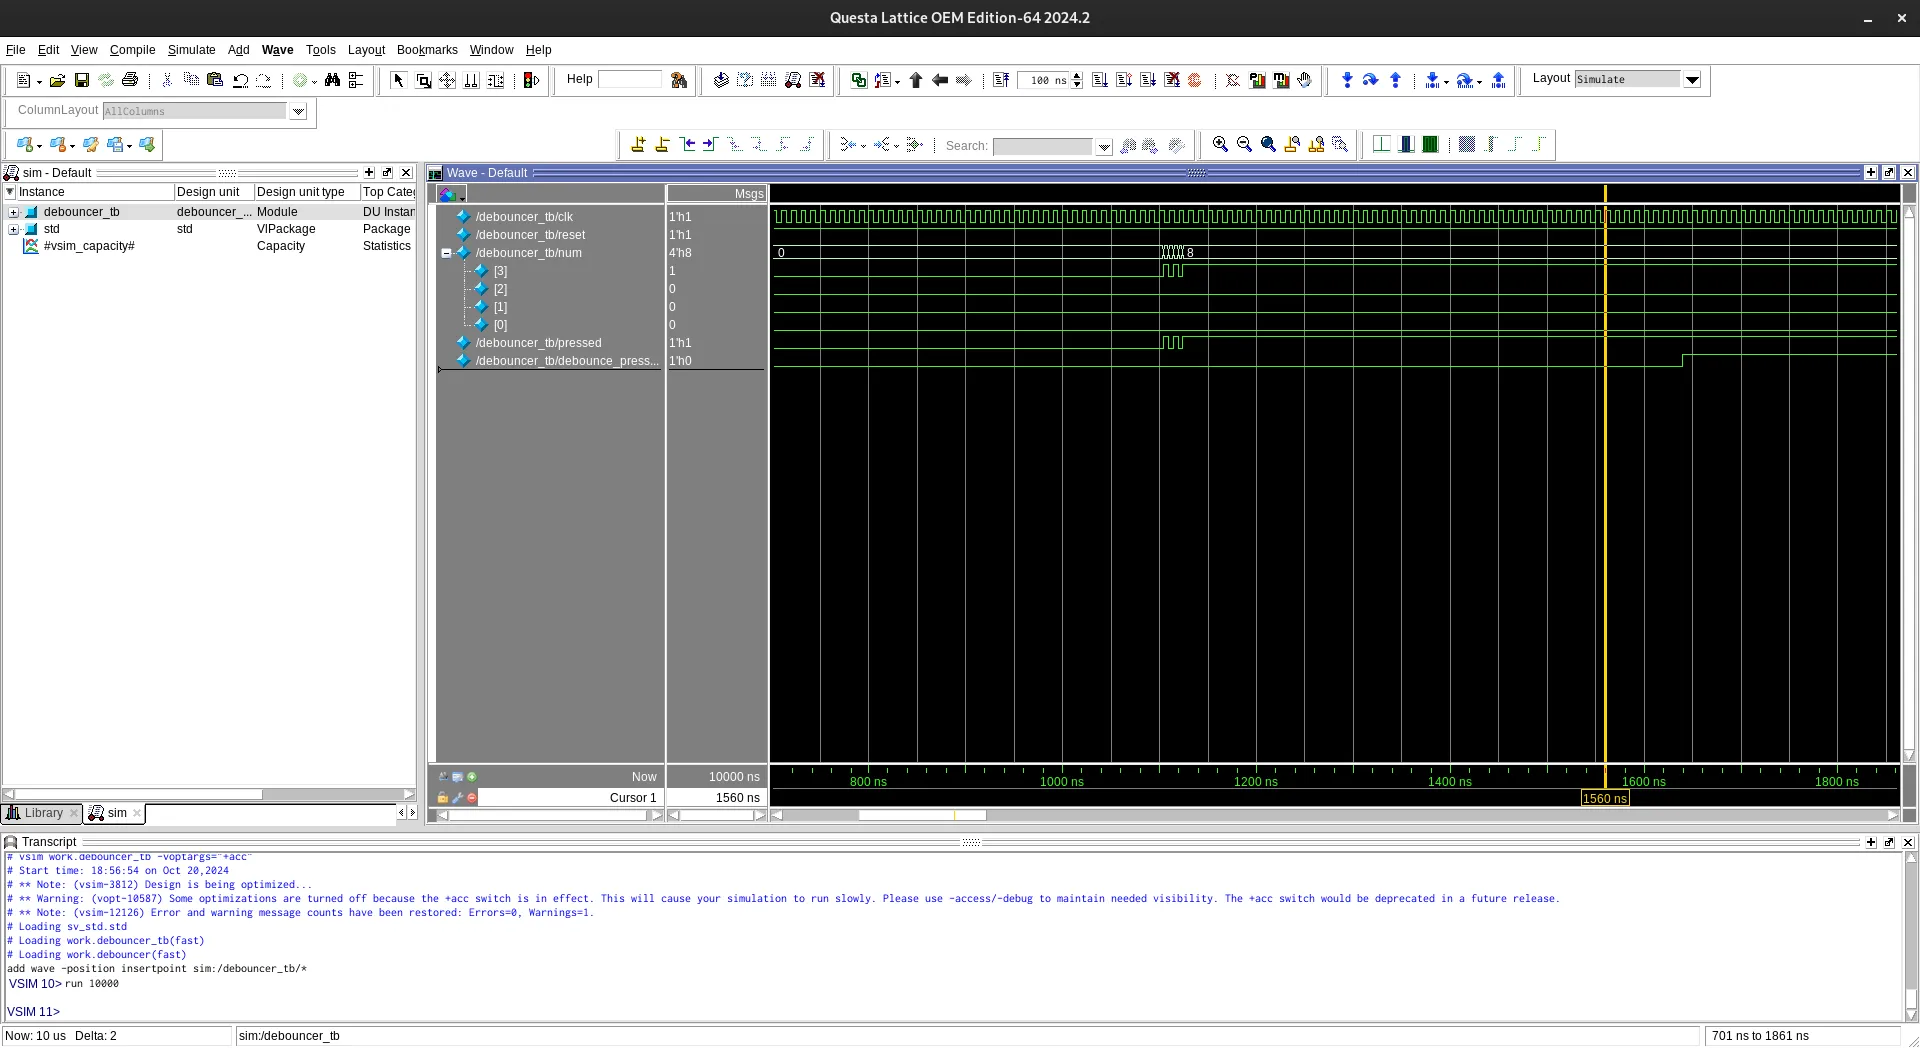
For this lab, it seems like testbench simulation was much more important than in previous labs, so I wrote the test benches rather early on. Here is a screenshot demonstrating the working scanner module with synchronizer.
And here’s one demonstrating a working debounce module.
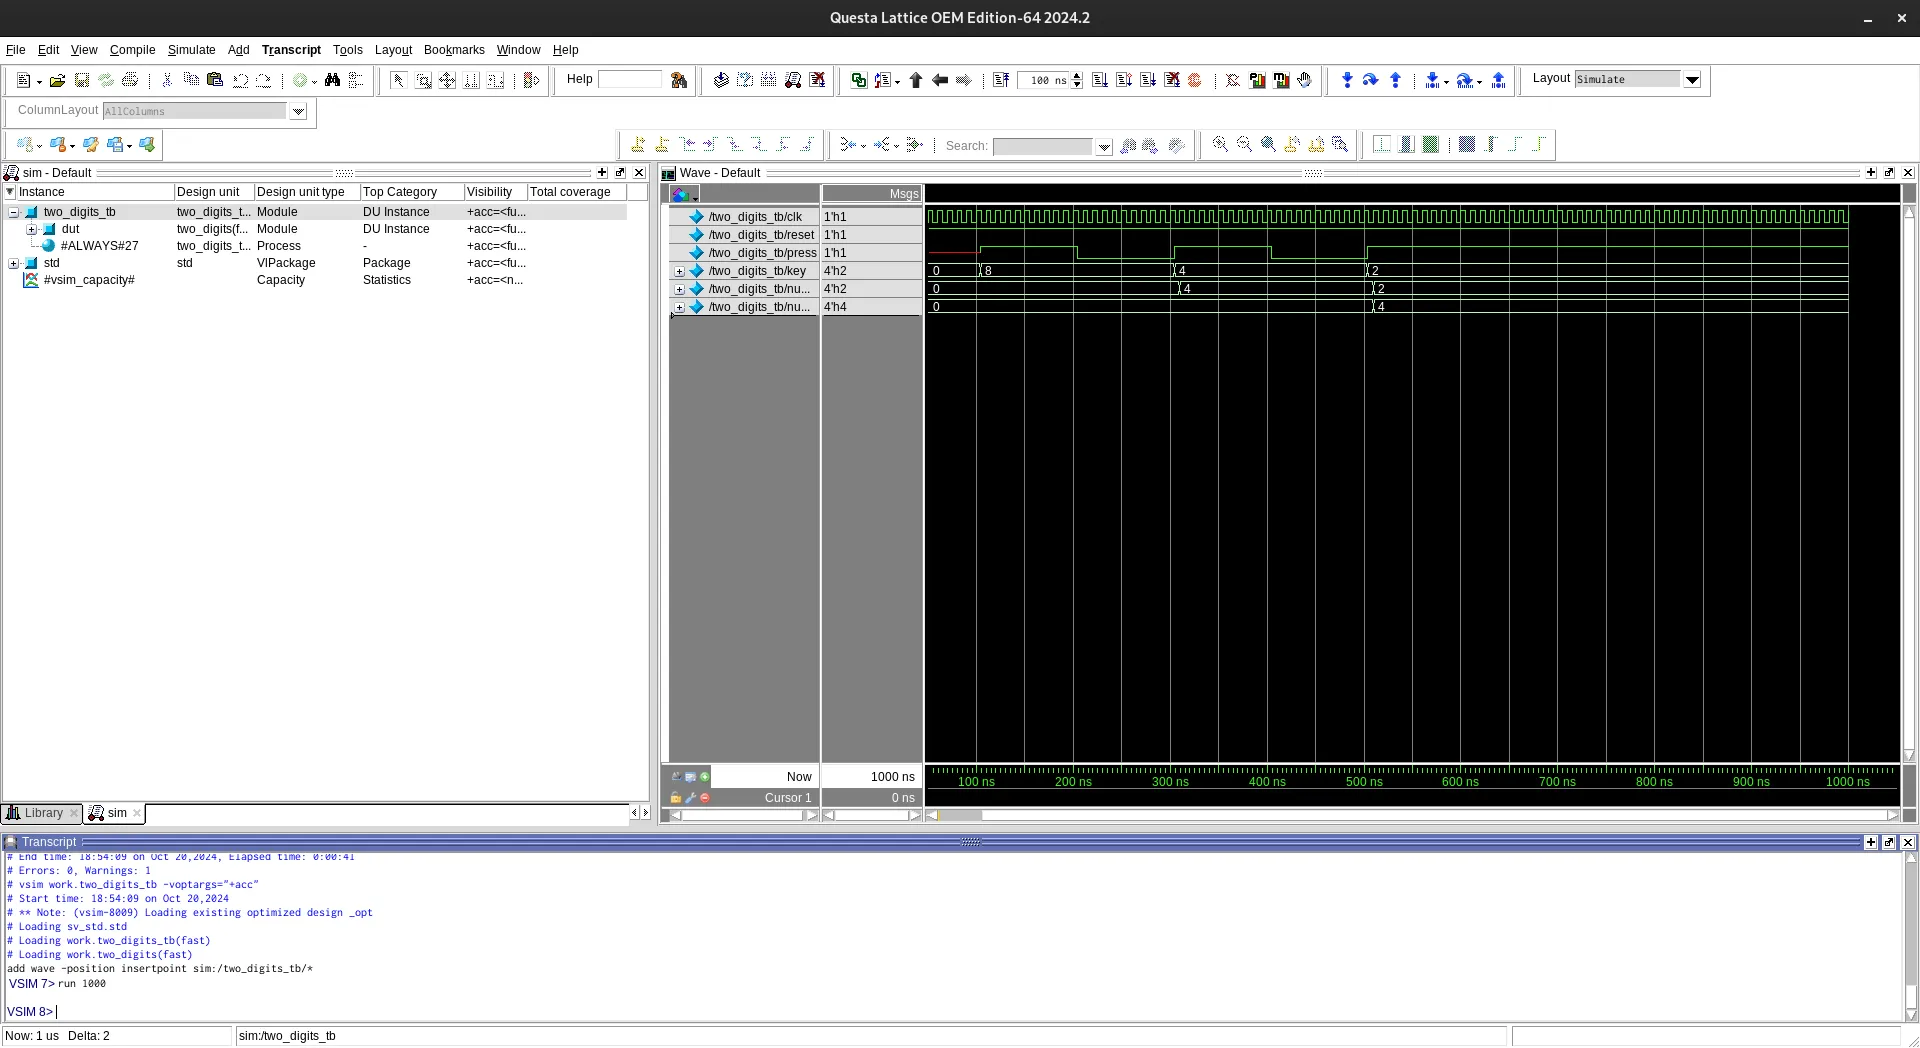
And one demonstrating the working shift register.
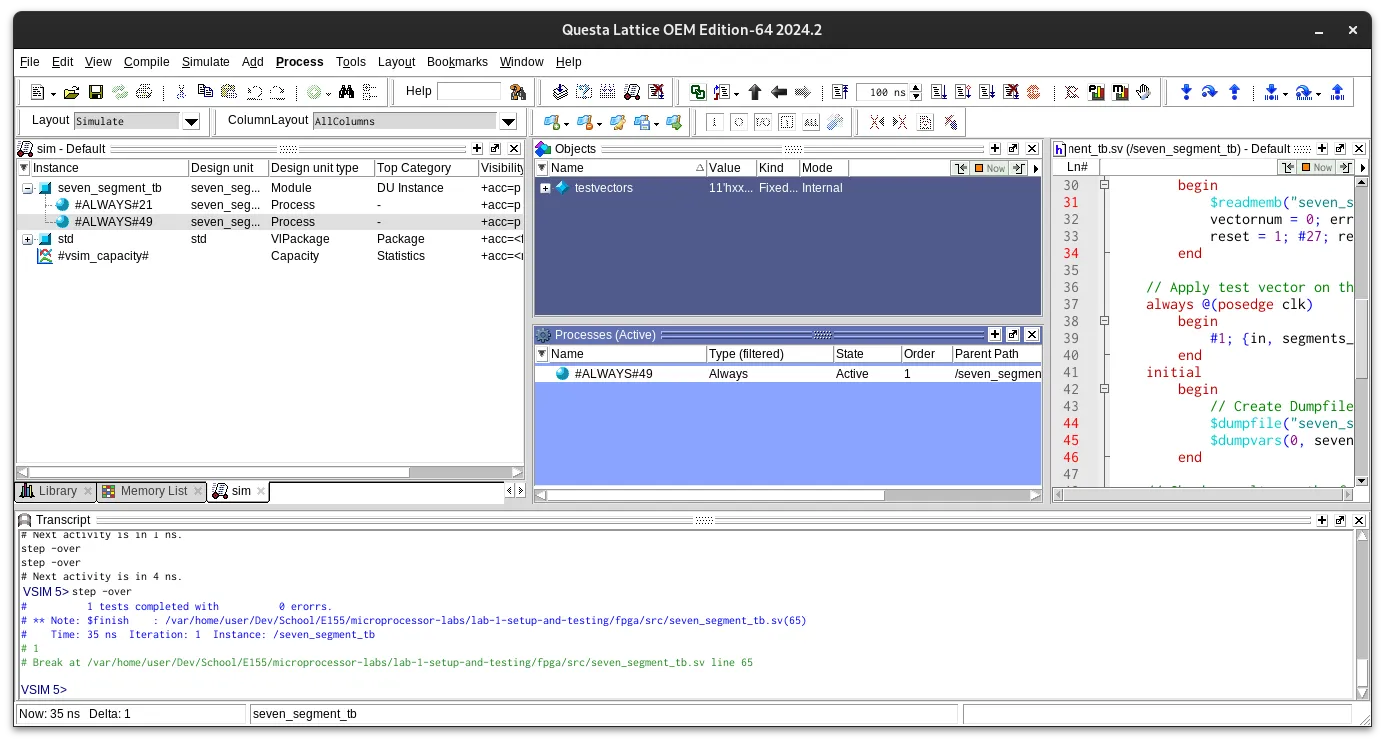
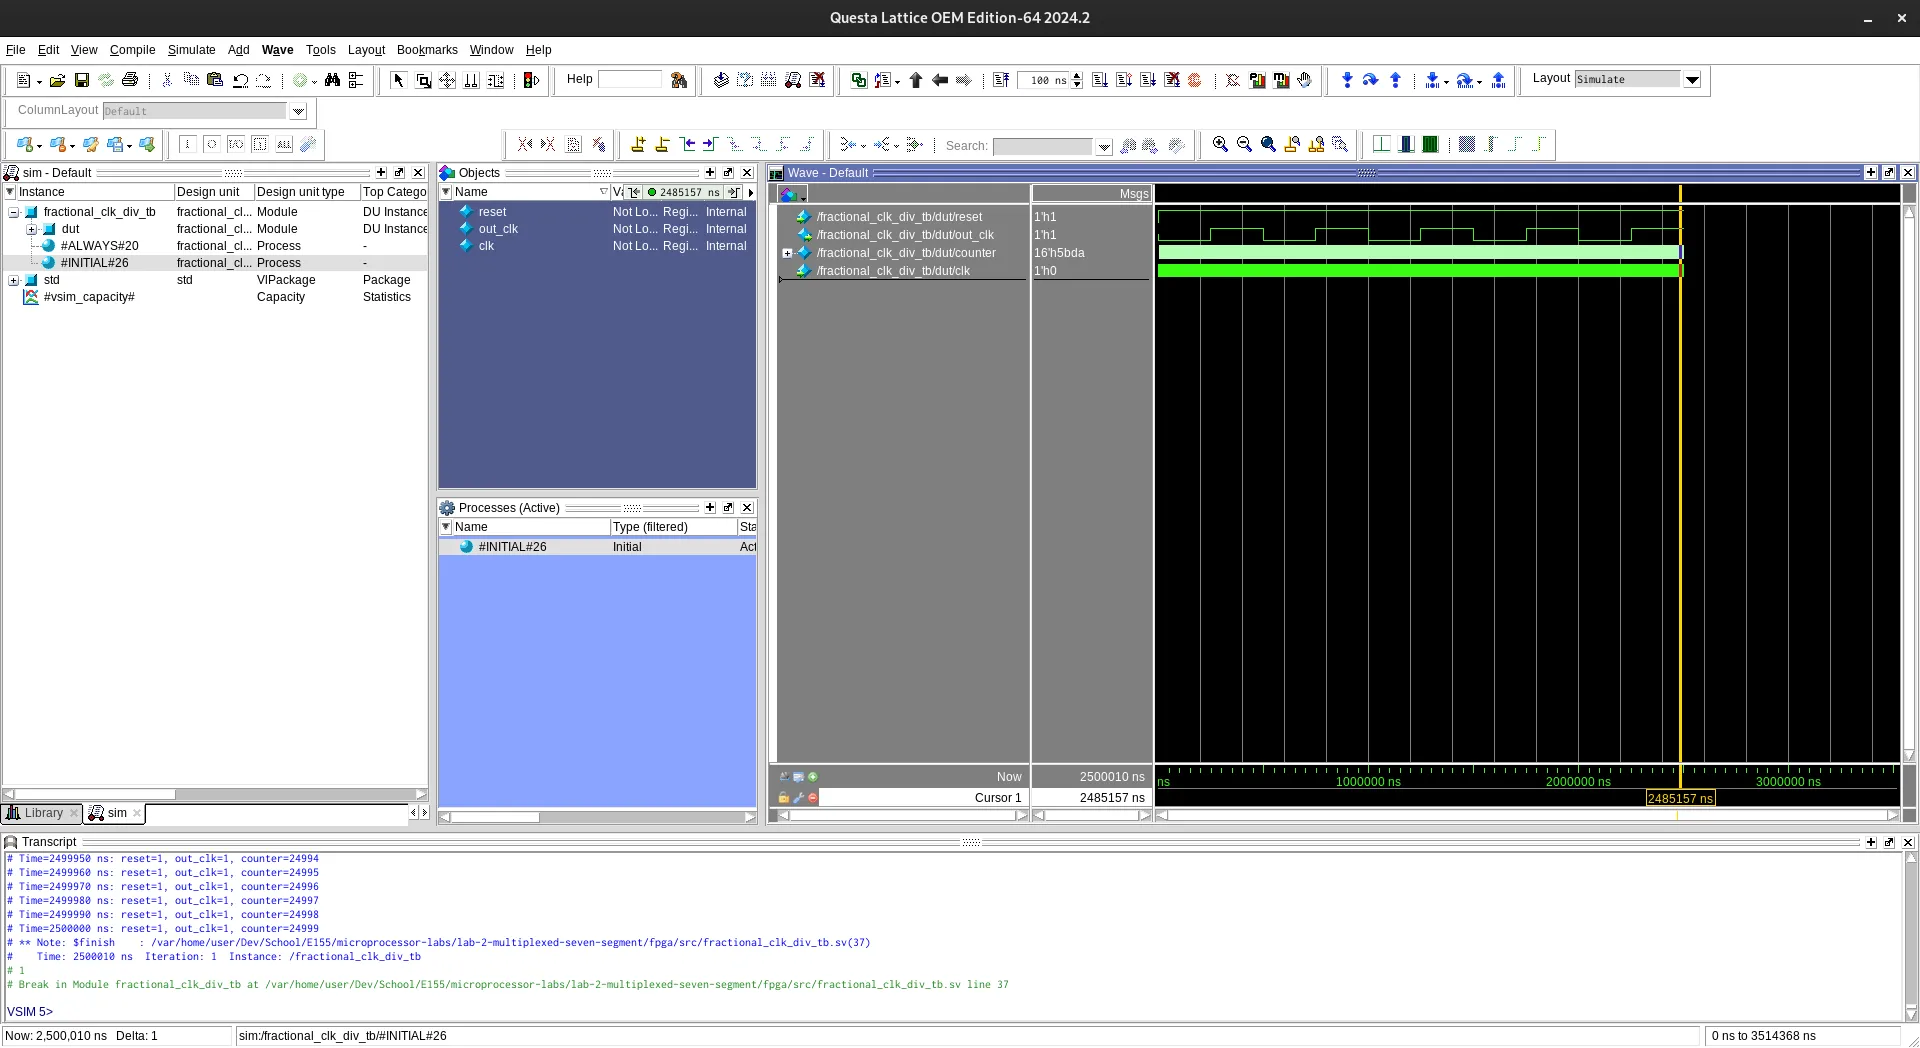
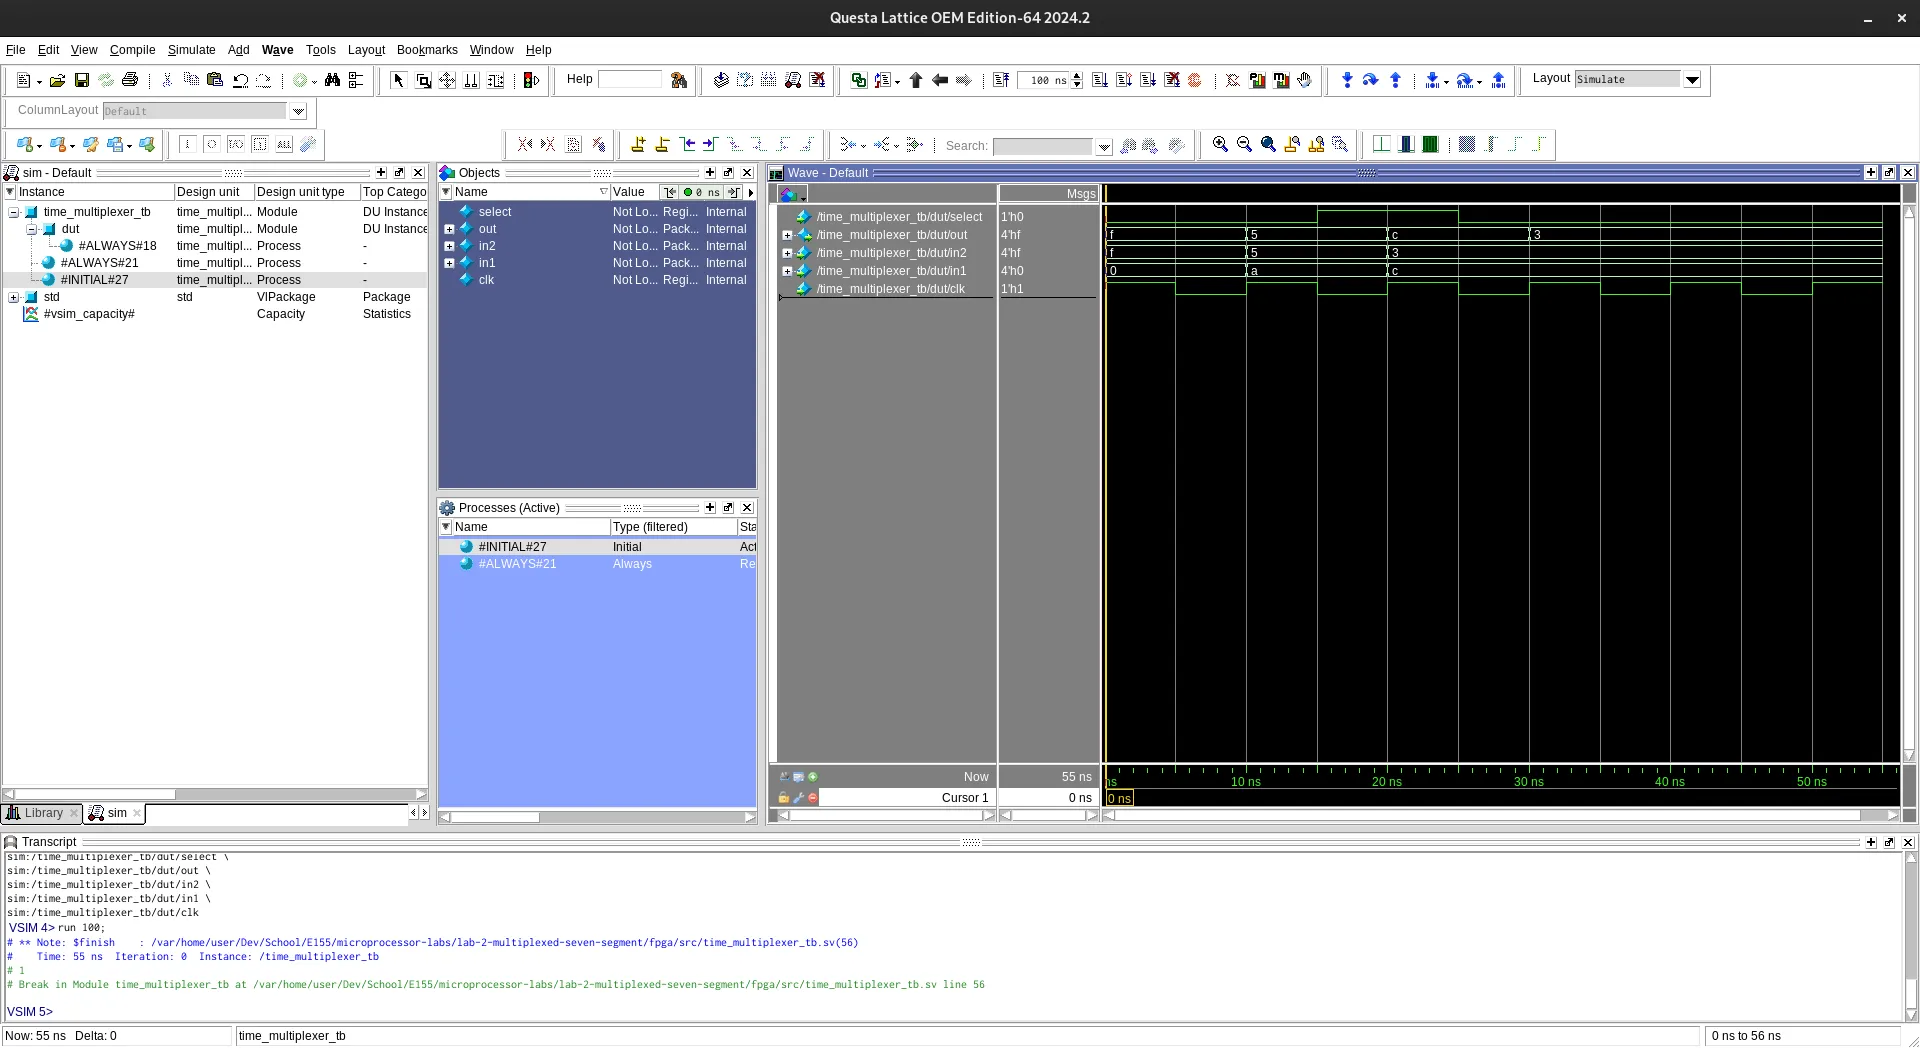
And modules from previous labs demonstrating a working time multiplexed seven segment display and clock divider.
Seven Segment Display:
Fractional Clock Divider:
Time Multiplexer:
Conclusion
This lab took me at least 35 hours to complete. I ended up being able to take input from a keypad scanner. It doesn’t sound like a lot for the amount of time I spent, but it turns out that operating at a low level means that even seemingly simple things can get quite complicated. I ran into a lot of weird bugs, and ended up rewriting the program entirely at one point. This lab definitely taught me a lot of good debugging skills. One of the key insights I gained from this lab came from one of the TAs for this course, who told me that this course was pretty much one huge debugging practicum.
Reflections
One of the things this course is helping me do is to get over my desire for perfectionism. Too often, especially when working on projects of my own outside of class, I get stuck on small details that aren’t perfect, and obsess over them. Eventually, I get frustrated, and often just give up on the project entirely. I get stuck on the planning phase, or perhaps stuck on implementation when something doesn’t follow my perfect plan. This class sort of just forces me to get it done.
There was a point in this lab where my SystemVerilog implementation just didn’t work. Henry, one of the TAs for this course just told me to rewrite it. There was a bug that I still don’t understand right now, but rewriting it did in fact help a lot. I’d spent hours just diving into trying to figure out why the bug existed, and it really just made no sense. While it would have been nice to understand the specific bug, I don’t think it would have been productive. Trying to frame this class as getting a deliverable to a client has been quite helpful. I just have to do it, even if my solution might be a bit hack-y, or just imperfect.
Moving forward, I hope the experiences from this class carry on to my personal projects. It’s incredibly rewarding to be able to finish a project, and I need to stop letting perfectionism getting in the way of making something good.